Monday, 14 April 2014

Dinosaurs Alive

Dinosaurs at Shah Alam Muzeum

The said exhibition commenced on May 2013, only on 6 April 2014, Sunday, I managed to make it a point to visit there.

Why it took me so long??? Namely I received many negative feedbacks regarding the exhibition. But my personal observation it is bloody worth it. Chargers are only RM10 per adult and RM5 per kid aged between 7 to 12 years old.

There is also a family rate of RM25 for 2 adults and 2 kids.

School going kids wearing uniform enters for free.

The aim of this exhibition is to enlighten the younger and older generation, on life before mankind.

The Sultan Alam Shah museum is located at Persiaran Bandaraya, Seksyen 14, Shah Alam, Selangor. 

The exhibition will be ongoing until the end of 2014, so try not to miss it. The exhibition is located in the adjacent building next to the museum. Opening hours are 9:30am - 5:30pm (Tuesdays to Sundays) and closed on Mondays.


The exhibition is in Bahasa Malaysia so be prepared. Its basic Bahasa so most will not have any issues understanding the banners and explanation provided 

This is what visitors are greeted as soon as they enter. What an awesome site. A Tyrannosaurus Rex. Below are some basic data provided on a fossil called Sue that lived until 28 years old making her the oldest living dinosaur. 


The most expensive and complete T-Rex fossil sold was at USD8.3 million 


Thereafter, visitors are greeted to Apatosaurus. This is a massive and huge dinosaur. As big as a bus.


Velociraptor. Those who had seen Jurassic Park would be familiar with this carnivore


The walk path inside the exhibition has footprints to mimic the footprints left by dinosaurs. Very ingenuity, if i must say  


Sample of a huge dinosaur fossil left in the dirt


Brachiosaurus, only the head is visible


Carnivores in action


The entrance out. The massive mammoth tusk. All the awesome sounds made by the dinosaur that accompany the exhibition, comes to an end as you exit the entrance.  


Sunday, 13 April 2014

Bookmarks

Greetings and salutations dear readers,


For today's topic, I would like to share my thoughts on bookmarks and recycling. I hold recycling close to my heart. We only have this planet to live on. We do not own it. We merely look after it for the next generation.


It's a famous saying for the infamous advert for Patek Philippe. I merely borrowed the same wisdom to attach the saying to mother earth.


A firm believer of 3R (Reduce, Reuse and Recycle), I try to do my part whenever I can. My latest project would be to reuse the price tags or label tags attached to clothes at the time of purchase.


Normally one would cut the price tags and dispose them in the garbage bins. I propose instead of utilizing additional money to buy your own bookmark, just reuse the price tags as bookmarks.


You have already spend money on clothes and it comes with the price tags, why spend more on buying bookmarks when you can easily reuse the price tags as bookmarks?


Hmmmm. Something for readers to ponder.


Furthermore, you can never know, the price tag of a branded item that you have purchased today could become a rare item years down the road, especially if the company does re-branding and changes its tag line or logo.


Below are some of the price tags or label tags that I had recycled into bookmarks.


Happy Reading 14/4/2014.


Thursday, 3 April 2014

Japanese Invasion Money (VJ)

The Japanese entered British Malaya overland from Kota Bahru, Kelantan on 8 December 1941 and worked their way thereto until the fall of Singapore on 15 February 1942. Overnight the Straits Settlements money became useable in Malaya. The Japanese issued paper their currency of 1, 5, 10 and 50 cents and 1, 5 and 10 dollars. The 1, 5 and 10 dollar notes initially had serial numbers (as they were printed in Japan); these were later omitted (due to massive mass production overseas). 

During the Japanese occupation of Malaya, they had one fast and hard rule regarding currency. If there is insufficient funds just print more. And this was precisely what they did, leading to inflation. Thus, the issuance of higher denomination.
Metal being a precious commodity for the must needed war materials,  the Japanese did not issue coinage during their occupation. 
The Japanese had no way to ascertain the amount of money they had issued as their resident forces (in Philippines, Malaya, North Borneo, Sarawak, Brunei, Burma, Netherlands and Oceania) were printing their own notes indiscriminately and they could only gauge by the weight of paper used in the printing. It is estimated between $7 to 8 billion had been issued during the Japanese occupation.
15 August 1945 Emperor Horohito declare surrender of Japan and the termination of war. The US / British declared this day as VJ (Victory Over Japan) day.


The surrender attested the end of three years and eight months of draconian, medieval and sadist Japanese military rule.

At the end of the war, and with their demise of Japanese sovereignty, the British reinstated the Straits Dollar and Japanese Invasion Money (JIM) were worthless.

The British deemed the JIM fit for fire. 
  
To publicize this, it is presumed that the British, overprinted the $5 JIM in red with "MALAYAN" on the  top and "WAR SOUVENIR" bottom; with "VJ" in between. "Grim Memories of 1941 - 1945" was printed in black italics across "VJ". These leaflets / propaganda notes (money) was airdropped by beginning 20 August 1945. The $5 JIM VJ notes had two types, one with block MK and the other block MR.


These notes happen to be one of my pride and joy. Rating RRR in rarity. Below the fake version and the original version.

Fake version (JIM is original only the overprint of VJ is fake). The red ink is too dark and too thick and the words grim memories and 1945 appears to have no gap on the VJ. Notice the block is MP and $10 denomination.  


Original overprint VJ. $5 denomination MR block.


Closeup of the Original. The red ink is finer and thinly overprinted. There is a gap between Grim Memories and 1945 and the VJ. 


Old Malaya Currencies

I am a newbie in the fascinating world of numismatic. Only started my involvement sometime in the mid of 2012. However, due to my blessed union with my ever willing to share sifu's, I managed to get a rather handsome collection.

Uncirculated  (UNC) 1/2 cents 1945 Nederland Indies. It's not easy to get UNC condition pieces. Most in peoples collection are circulated pieces. 


Closer view, front and back


Gold coin Sultan Inayat Shah. Reign from 1678 to 1688.


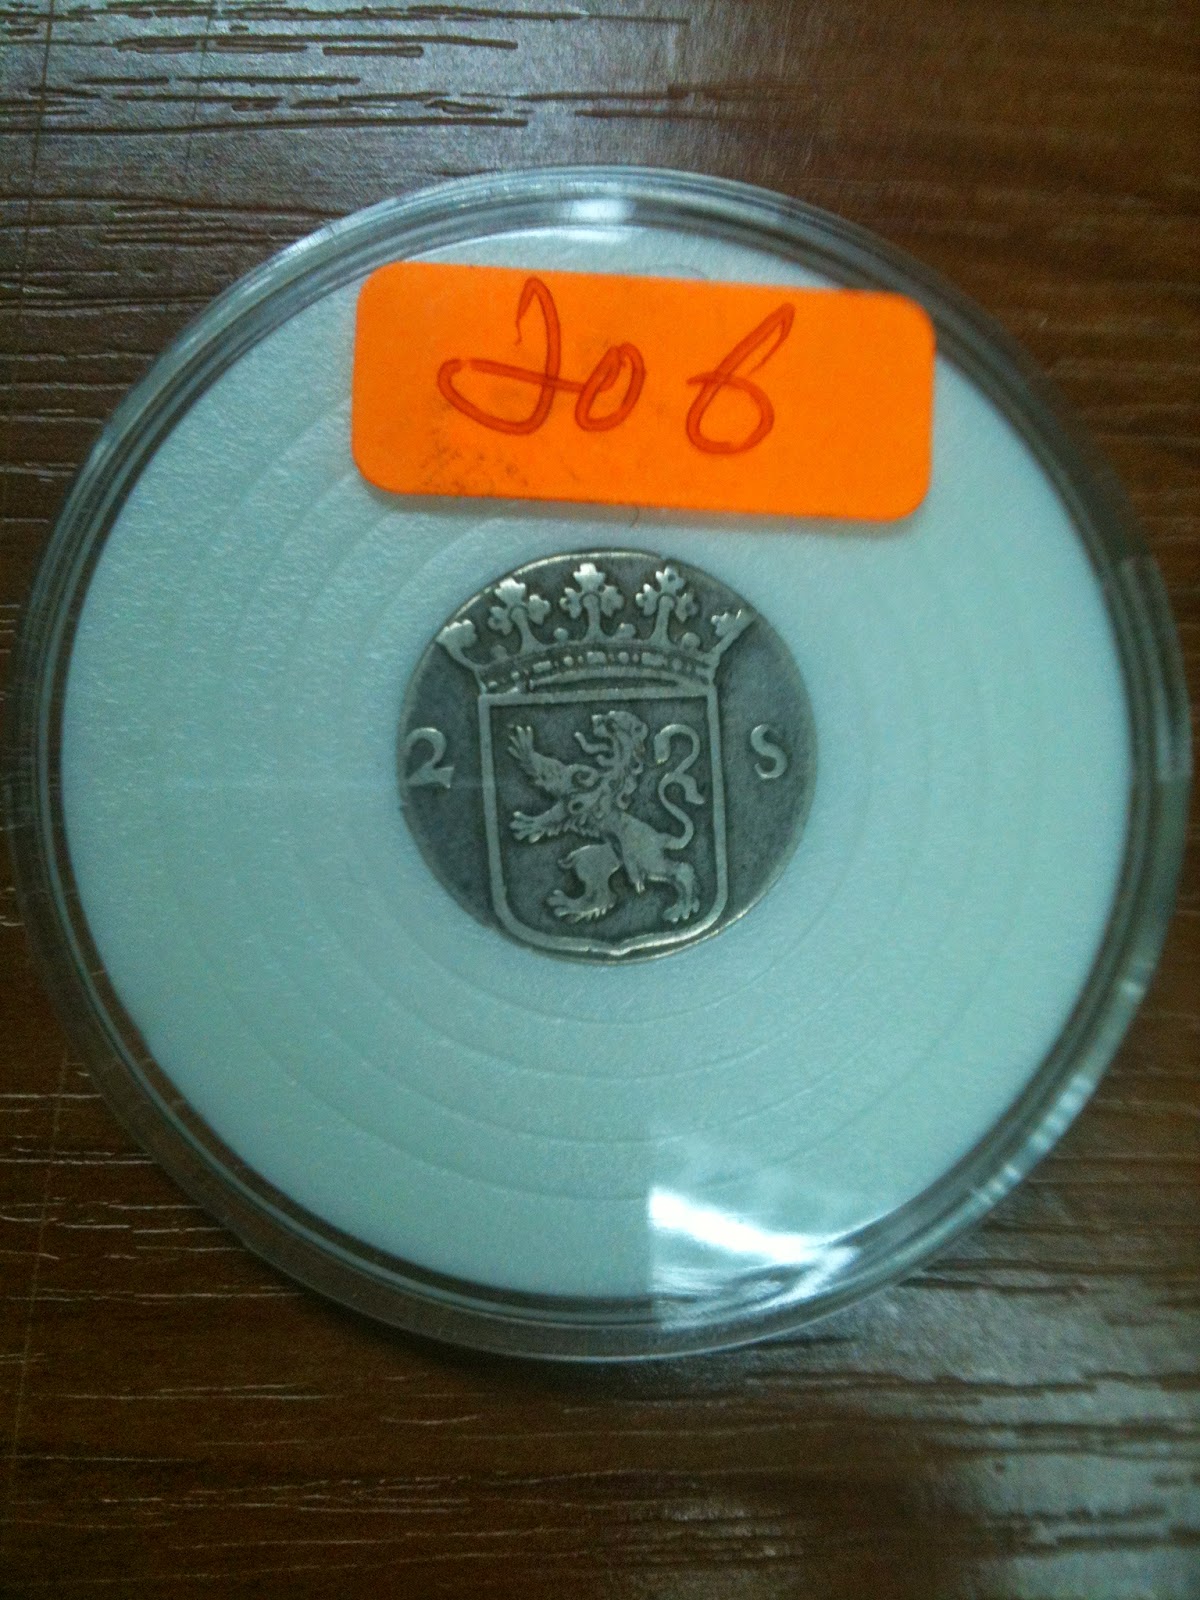
1789 2 Stivers Singapore Merchant token (silver). Picture front and back.  


Bank Negara Malaysia RM1.00 (2nd series), RM1.00 (1st series) and Board of Commission of Currency Malaya 1 cents and 5 cents. 


Easter & Halloween

4 April 2014, my entry for today, it's a heads up on the coming Easter celebration this 20 April 2014. Just to share what I did the previous Easter. 

What I did was rather unorthodox, I made it a joint festival, Easter Egg's come Halloween celebration. Kill 2 birds with one stone and loads of fun. I purchased the Halloween mask at Toys r US (Empire Shopping Center) at RM9.90 (i think). Used an old white bed sheet and sprinkled it liberally with red food coloring. My advise do not use a paint brush as it would spoil the blood effect. Used about 3 bottles, each costing RM2.90. My kids were terrified at first altogether they subsequent realized it was me but no less terrified.


I did a map of the house and hid in various locations x marking the spot and quantity, Easter eggs and Candies. Their task together with Mom was to locate the goodies.


I began first by boiling many eggs, 2 dozen to be exact. Ensure that the eggs are properly boiled to ensure that the shell peels of easily when cracked. You want perfectly round eggs and not deformed looking ones.


Then I allowed my kids to paint the eggs using any colors they liked and their creativity. Only use food coloring the reason being the paint will absorb trough the shell. The problem with food coloring is that it would stay on the palm and fingers of your kids for a few days no matter how you wash them. 


The end product. After the eggs dried, they were hidden based on the map provided above.


The picture of how the eggs looked like after the shells were removed. Reminder use food coloring for painting the egg shell and not other type of coloring. You do not want to poison your kids.


Like I said as this was a dual purposed function, Halloween would not be complete without a scary pumpkin. Choose a decent size pumpkin. Don't choose a too small one as it would be difficult to shape.  


 Start first by using a marker pen to outline the eyes, nose, mouth and top of the head.


Carefully carve out the outlined area. When using a knife, always take your time and no not rush. Remember the last thing you want to do is damage the pumpkin and also cut yourself.


Use a smaller knife to chisel out sharper and deeper features for the eyes, nose and mouth area. 


You will notice there's lots of filling and seeds inside the pumpkin. You will need to use your hands and also various sizes of spoon to remove the fillings.


Before and after photos of the fillings being removed.


 I cannot stress enough that you must ensure that the cuts for the eyes, nose and mouth is deep and wide. 


Place candles inside the pumpkin.


 This is how it will look after dark. Now you know why the cuts for the facial features should be deep enough. Its for the light to shine clearly through. If wrapped in a newspaper and stored properly in a fridge, the pumpkin would last a few days and can be reused.


Dinner as you can guess was pumpkin soup.


Tuesday, 11 February 2014

Connecting PSP to HDTV

Hi, Greetings and Salutations. On a lighter note, I would like to share my experience with owning and playing a Sony Play Station Portable, i.e. Sony PSP.

I must admit that I am left out way behind compared to the avid hardcore gamer. People are now playing Sony PSP Vita (portable), or (stationary) Sony Playstation 4, Wii Nintendo or Xbox 360. Only in December 2013, I purchased my very own PSP 3006. My decision was based on the fact that the unit must be portable, hence, my kids can play with it wherever we go and it should not be limited to only one game. All I needed to do was purchase multiple UMD games to keep all of us entertained.

The added bonus was that the PSP 3006 has wifi functions, hence, I am able to surf the internet.

But the drawback is that the LCD screen is rather small at 4.3 inches.After some time you will get bored and wish for more action. Lets not forget, being a portable game console, the size of its speakers are also rather small, therefore, forget about state of the art sound system or solid bass.  The solution was getting a Component AV Cable to connect the PSP to the TV. With this, I would be able to use my PSP and view the games on the TV and get solid sound as well.     
Below is the Sony Component AV Cable


The Cables out of the box. You will notice that it has multiple color points which will need to be connected to the sockets in the TV. The other end will be connected to the PSP


Ensure that you connect all wires accordingly to the color code. Failure to do this will result in your picture quality being compromised


Adjust the setting in the TV to accept Component


Go to Connect Display Settings


Click Switch video output


The system will then ask, "do you want to display video output on a connected devise?" Click Yes


Scroll to UMD Game and connect


Wah-lah connected


Notice the greenish hew. The result of connecting the cables wrongly to the TV. Always check to ensure that your cables are correctly connected according to the right color codes. If your TV has for example 3 red color sockets keep changing your red color points on your AV cable until you get it right. The same goes for the other color points


After ensuring that all cables are properly connected according to the correct color codes